Propane locker part 1
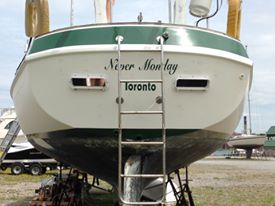
When we first installed our propane system on Never Monday we lashed our propane tanks to the stern pulpit. While this worked for keeping the tanks "vented" and i'd done the same on a previous boat (also with 10lb tanks). the result was a bit ugly and in incident where the stern of the boat got hung up on some piles made us plainly aware of how vulnerable this also left the tanks
We decided that the tanks needed more protection, both from the elements and to move them inside the the life lines to give them some additional protection. We looked at commerical options but at close to $1000 for a locker that would only hold one tank,we knew that there had to be a better option. After all they are just a fiberglass box! In looking around at my options I found this blog post:
Pheonix's custom fiberglass propane locker


 |
| Original tank hanging from rail. |
Pheonix's custom fiberglass propane locker
So I set out to build my own....
Step 1 was to decide on the dimensions. We carry 2 10lb tanks for propane and wanted to have space for 1lb bbq tanks so the locker had to accomodate all those items plus the regulator and solenoid. I settled on using 10 inch sonotubes to form the ends of the tank. Beware though, there are 4 different sizes of 10 inch sonotube, marked with a #1 - 4 on them and each size fits snugly inside the next. I ended up using #3 tubes for the main body of the locker and #4's to make the lid.
Step 2. build the form
I settled on using 10 inch sonotubes to form the ends of the tank. Beware though, there are 4 different sizes of 10 inch sonotube, marked with a #1 - 4 on them and each size fits snugly inside the next. I ended up using #3 tubes for the main body of the locker and #4's to make the lid. The bottom and top of the form are made of 1/2 inch MDF for its ability to be easily shaped and cost!
One I had the shape I wanted (using the tubes, MDF and some spray can foam to fill any gaps) I covered the whole arrangement with a layer of packing tape, followed by 3 coats of wax and 2 coats of PVA release agent.
Step 3 laying up the glass.
I had a bunch of 1708 laying around so I glassed the molds with 3 layers of 1708 (ya its strong!) This caused some issues with bulk at the transition between the sides and bottom. because of the volume of resin needed for this project I used polyester resin ($68 a gallon vs $180!!) and I think that's perfectly fine for this use.
After laying up the glass ( the lid has a piece of 3/8 marine ply in it to stiffen it for sitting on!) I was able to demold them fairly easily, just tear apart the cardboard sonotubes and then pull out the MDF pieces. a bit of work with my big 7 inch disc sander and the parts now look respectable. They still need some more sanding to get the final shape but we're getting there
In the left picture, you can see the tunnel molding that is used to store the 1lb BBQ tanks, On the right the locker with the lid.
part 2...Sanding, sanding and more sanding!

Comments
Post a Comment